I'll make this post into a link party. Please feel free to link up your own craft tutorials. I'd love to see what you've been up to!
So... You'll need:
Essential:
- Chalkboard paint - I got a spray can in Hobbycraft, but I think you may be able to get it in B&Q or other DIY places (probably cheaper too!).
- MDF - I used 3mm, or any flat object to paint, as long as it's not too heavy if you want to hang it on the wall.
- Sandpaper
- Pencil
- Jigsaw
- Newspaper
- Acrylic paint
- Paintbrush
- Picture hook if you want to hang your blackboard
- Light bits of wood
- Wood glue
Draw your design on the MDF. Keep it simple as you want to be able to tell what it is in outline form. I decided on a fairy cake/cupcake:
Step 2
Cut out the shape with a jigsaw (I got Mr W to do this bit as I don't trust myself with such tools!)
Step 3
You can skip straight to this bit if you've got a pre-cut shape that you want to use. Lightly sand the surface to prepare it for the paint.
Step 4
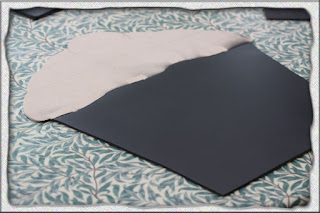
Place newspaper over any parts that you don't want black. I covered up the icing part that I wanted to paint in other colours.
Step 5
Go outside for this and cover the ground with newspaper. Lay your board down and spray! I found that I needed quite a few layers to get a smooth finish. Mr W couldn't help 'assisting' here as he used to be a printer/sprayer when we met all those years ago! And he of course, thought he knew best:) It turned out he did know best in this case...
This pic is of another project, but you can see the spray can I used:
Cover up the parts you don't want painted:
Newspaper removed:
Step 6
Wait for about half an hour and see if it needs another coat. If not, then you're ready to paint the rest. I painted a coat of white acrylic first and then yellow for the icing, a red cherry, chocolate buttons and colourful hundreds and thousands.
Step 7
To make the chalk holder I used four of these small bits of wood I had left over from something:
I painted them yellow, stuck them together with wood glue and then glued it to the board.
Step 8
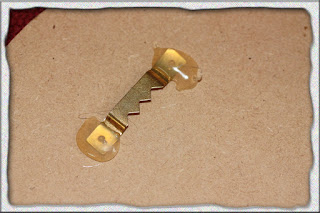
Attach a picture hook with a bit of wood glue to the back like so:
Here's the blackboard before the chalk holder was attached:
Had lots of lovely comments. I think it looks pretty good myself:)
So, let's see what you've been up to. Link your craft tutorials below. Can be anything at all, as long as you've made it yourself. No thumbnails this time, so choose your title carefully.
Rules:
- Please link to your specific post, not the whole blog
- Please link back to this blog, either in your linked post or another post
- Please try to visit and comment on others' links
- Have fun!
*************************************************


This is awesome! Good job :) Hx
ReplyDeleteThanks H! x
ReplyDeleteThat looks amazing! Not sure I would trust myself with a jigsaw either.
ReplyDeleteHa ha! Thanks:)
ReplyDeleteBrilliant tutorial - very excited as I was as little dubious about blackboard paint - I am now inspired for my next project!
ReplyDeleteThank you! It's pretty easy to use, although I think you need a few layers to get a smooth finish. Have fun:)
Delete