Home of The Small Art Company and a bit of British all sorts about my family, kids, home, art, mixed media, craft, photography, illustration, travel, cooking, organisation, teaching... Good to see you:)

Thursday, May 26, 2011

Children's Book Illustration


That's the course I'm doing! I've always loved to draw, but never thought I was much good, which is why I never took creative A-levels or degree, Well, I did start Design Studies along with Marketing and Psychology for my degree, but that's another story!!


I've also always written stories, although never seem to finish them. The last one I started was in 2007, which I aimed at 7 - 9 year-olds. However, I decided that the subject matter was really for younger children, so I'm going to rewrite it and make it into a picture book.

I've learnt lots on this course already, so hopefully I'll be a little better qualified to illustrate as well as write. I'm certainly not expecting it to be easy, but to have a book published is a dream I've had for so long, I have to give it a try.

Anyway, here are some illustrations from the assignments so far. The first exercise was a collage of wet-on-wet watercolour:


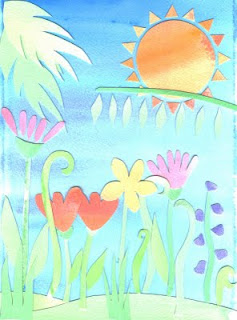
Using the same technique, the brief was to create a two-page spread about a tiny tree seed who travels through the seasons and comes to land in a field:


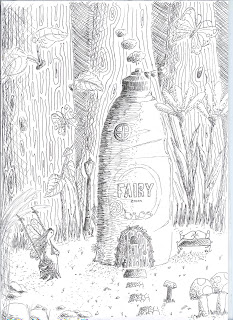
I got some lovely comments from my tutor about this one. I haven't submitted the next two yet, but the exercise was to use pen and ink to draw household squeezy bottles with a character. I did two, as I couldn't decide. Here's a fairy house:


And then I did a suncream bottle with a lizard-type creature:


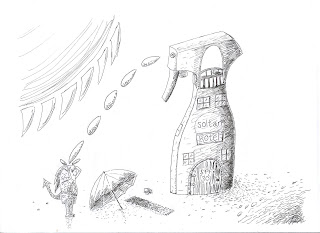
I'll submit these when I've finished the second brief. Just on the painting stage at the moment... Has taken me ages to draw, although I have really enjoyed it! I'll post the finished piece when it's, well... finished!


Doing this course does mean my shops are becoming a little neglected though. I'm going back to teaching as well, part-time. It's so hard to fit everything in! I might start selling these illustrations though, depending on how they turn out. Mind you, that will probably mean another shop..!

Thursday, May 12, 2011

How to Decoupage a Box

It was my Mum's 60th birthday a few weeks ago (on Mothers' Day to be exact) and I decided give her a handmade present, as I know she loves things I make more than anything I could buy. Well, that's what she says..!

I thought a keepsake box would be a perfect gift, so I had a look at ways I could make one and came across decoupage. This is basically where you cut out pictures and glue them to a wooden or cardboard box, before covering with layers of glue for a clear finish.

Anyway, here are some photos of the process:

Here's the cardboard box - just a plain brown cardboard box from Hobbycraft.


Then I needed to decorate it with paper, so I screwed up a piece of white A4 and then dabbed some brown pigment ink on it. The idea was to give it a kind of antique look... This was to cover the lid.


I covered the sides in pink and green paper and again, stained the edges with brown ink:


I wanted to use my own photos, so printed them on a laserjet printer and carefully cut them out. As well as the flowers, I used some family photos too:

Here's the lid covered in the screwed up and stained paper:


Then I arranged and stuck the photos on the top and sides. I used Mod Podge to do this, as I was following American tutorials, but I think you can use any PVA, which is probably cheaper.

And here is the finished box:


Once you've stuck the pictures in place, you just keep brushing over the glue, letting it dry, before adding another layer. I did about 5 layers of glue to give the box a varnished appearance. The idea is that you keep going until you can't feel the edges of the images anymore. My lid wasn't completely smooth as I'd scrunched up the paper, but it turned out pretty well!

A couple more pics:

A close-up. You can see a young Mum and Dad here! And myself and my brothers on my wedding day...


Oh, nearly forgot to mention the inside. You can just see the felt I used. I simply glued it to the sides and for the bottom I covered some quilt batting I had left over from my memo boards.

And this pic shows my grandparents and my mum when she was little, Tiggy, the gorgeous labrador we used to have and my two children.


So, there we have it; a very basic tutorial on how to decoupage a box. It's really simple and makes a lovely gift, so give it a go!